Jun 30, 2025
In today’s fast-paced world of worksheets, flashcards, and school interviews, it’s easy to lose sight of what really matters during the early years of childhood. For preschoolers, real learning isn’t

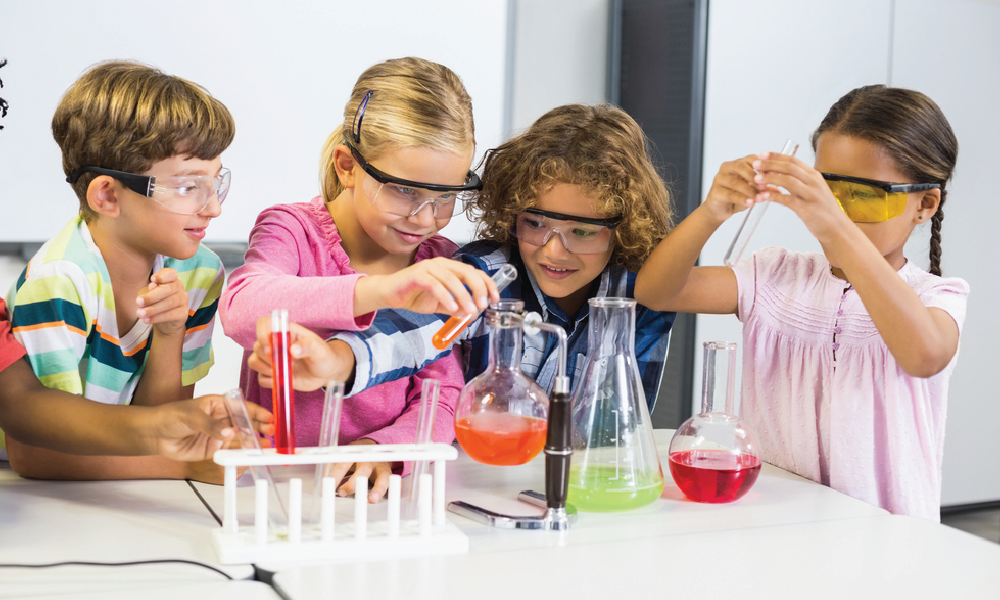
Science is a word that derives either absolute terror or absolute joy among all its students. Do you remember having an irrational fear of the subject? Even before it was introduced in class, we were made to believe it was a subject for the “geniuses.” With names like Albert Einstein, Isaac Newton, and Marie Curie linked to it, no wonder science seemed like a tough nut to crack. Yet all science does is explain what goes on in our world, every day, all the time. It is essential knowledge, covering concepts that influence our normal lives. Luckily, children are born scientists with an innate curiosity for their surroundings. Wondering how to convert abstract topics into science experiments for kids to do at home?
Here are some kid-friendly science experiments for kids to do at home using basic household materials. You never know, one of these cool experiments could prove to be the “Eureka” moment for your future Nobel Prize winner.
An easy experiment to start with, this is guaranteed to become one of your go-to chemistry experiments in the kitchen.
What You Need
Steps
Pour milk in a shallow bowl and allow it to settle before the next step. Now put a few drops of food coloring in the bowl of milk. At this point, they’ll look like self-contained circles. Next, dip a toothpick or Q-tip into liquid dish soap and touch the soapy end to the food coloring, holding it there for 10-15 seconds. Watch the magic unfold as the colors swirl around on their own.
What’s Happening
Although milk is mostly water, it also contains fats, vitamins, minerals, and proteins. Fats and proteins are sensitive to changes. When the soap connects with the milk, the invisible soap molecules connect with the fat molecules. This causes fat molecules to twist and turn, which we see through food coloring. How? During this molecular aerobics demonstration, food coloring molecules are pushed and shoved everywhere, giving your kid the opportunity to observe all that previously invisible activity. As the soap and milk mix evenly, the action too slows down to an eventual stop.
Stay active
Arguably one of the most famous science experiments for kids to do at home done by not just children but probably their parents too. This science fair favorite teaches kids about density.
What You Need
Steps
Fill up the bottle 1/4th full of water. Pour the vegetable oil into the bottle until it is almost full, using a funnel if you can. At this point, the oil and water as you watch. Add about 10 drops of food color of your choice. The color makes its way through the oil and only colors the water. Divide your fizzing tablet into 2 or 4 pieces, dropping one piece into the bottle. The next step is to break your fizzy tablet in half and drop part of it into the bottle. Watch what happens when the bubble blobs form. When the bubbling stops, add another piece of the tablet. If you have a flashlight, turn off the lights and shine the flashlight through the lava lamp while the blobs are bubbling! Once the entire tablet is used and the bubbling has stopped, cap the bottle, tipping it back and forth. Enjoy the waves of colorful blobs!
What’s Happening
Oil and water do not mix even if you shake the bottle because of a difference in their density. The oil floats on top of the water because it is lighter than water. The food coloring has the same density as the water so it sinks through the oil and mixes with the water, proving like dissolves. When the tablet is dropped in, it dissolves to create a gas called carbon dioxide. Gas is lighter than water so the bubbles float to the top bringing with them the color that the bubbles attach themselves to. When the air releases from the colored water blob, the water gets heavy again and sinks. When the chemical reaction between the tablet and water is over and the bubbling stops, you get an awesome-looking wave bottle.
This easy science experiments for kids to do at home will teach your kids all about light refraction, using not just the most basic of materials but will not require any supervision either.
What You Need
Steps
Start by drawing two arrows on a paper, one at the top and another at the bottom. The arrows should point the same way. Now place that paper behind a glass of water. Next, pour water into the glass and watch as the arrow you can see through the glass changes. Replace that paper with another, this time with something written or drawn on it. You can write words that mean something even when inverted such as bud or now/won.
What’s Happening
Refraction is the bending of light that takes place when light travels from one medium to another, such as from air to water or water to air. In this experiment, light travels from the paper through the air, then into the glass, followed by water and back out through the glass, finally going through air one last time and into our eyes. Whew! The light reaching us is refracted as it travels at different speeds, fastest through the air, slower through water, and slower yet through the glass. The water glass becomes a convex lens, bending the light both times it goes through the glass. Thus, the crossing of these light paths makes the image appear flipped or inverted.
It’s a fun and basic science experiment to do at home for kids of all ages that will build a foundation to understand density and buoyancy.
What You Need
Steps
Fill a tub or bucket (or any container) with water. Get items lying around the house like toys made of wood, metal or plastic, aluminum foil, a variety of fruits, rubber balls, bath toys, pencils, erasers, bath sponge, bottle caps, or even silver cutlery. Now ask your child to grab a pencil and paper to make three columns, listing the objects in one and writing “sink” and “float” in the other two. Start by asking the child to predict which items will sink and which will float. Then test them one by one, ticking the appropriate column as you go. You can check their scores to see how many they got right on their end. Now that they’ve understood what causes the floating and sinking, ask them what they would do to make the sinking items float. You can also add liquid dish soap or salt to the water to see how that changes each outcome.
What’s Happening
Density is the amount of mass per unit of volume. In simpler words, objects that are heavy yet compact have a higher density. Those objects that float on the water have a lower density than water and the ones that sink have a higher density than water. Kids will understand through this easy science experiment that the weight or size of an object is not enough to determine its density. So the objects either float or sink depending on their density in relation to the density of water.
Also Read: Top Vacation Activities For Students To Do At Home
Literally, raise the hair on your child’s head with these science experiments for kids to do at home that is super simple to set up but so much fun! Learn all about the positive and negative charges and how they react to each other.
What You Need
Steps
Start by blowing up the balloons and tying them with strings. Tear the tissue into little pieces. Take one balloon and put it close to the tissue, the other balloon, and your child’s head. Note what happens. Now rub the same balloon with the cloth and repeat the process, taking it close to the tissue and their hair. Next, rub both balloons with the cloth or your head and try getting the balloons close to each other. You may have to rub the balloons a few times every minute or so.
What’s Happening
All objects are made of atoms inside which are protons with a positive charge, electrons that are negative, and neutrons having a neutral charge. Thus most objects have a balanced charge. When you take the balloon in the beginning and place it close to the other items, nothing happens. But when that same balloon is rubbed with a cloth, negative electrons are added to the surface of the balloon. Now we know that as charges repel and opposite charges attract each other. This is seen when the positively charged tissue pieces are attracted to the negatively charged balloon and stick to it. Similarly, your hair stands up to meet the balloon for the same reason. To display what happens when like charges meet, both balloons are rubbed on the cloth to create
negative charges and when they are put close to one another they move away from each other.
An activity that looks like a mix between science and Holi, this easy science experiment for kids to do at home is a great way to demonstrate capillary action. The color wheel would be handy here too!
What You Need
Steps
Place the glasses in a circle or straight line. Fill each glass to the top. Add color to every alternate glass – Leave the first glass empty, add blue to the second glass, yellow to the fourth glass, and red to the last one. Next, roll the paper towels, trimming them to a length whereby each end of it can be fully immersed in the glass but the middle does not stand up too high between the glasses. Take one paper towel and put one end in water and the other in the blue jar. Take another paper towel and put one end in the blue jar and another in the third jar that has just water. So on and so forth, you should be left with each jar having two paper towel ends in them. Watch as slowly the colors transfer from one jar to the next. It should take about 20 minutes.
What’s happening
The reason color starts moving upward, defying gravity, is due to a process called capillary action. It is the ability of a liquid to flow upward in narrow spaces. How? The tendency of water molecules to stick to things is called adhesion. But these water molecules also stick to themselves called cohesion. In our experiment, the water molecules stick to the fibers in the paper towel due to adhesion and the rest of the water molecules follow due to cohesion. This results in water, as well as its color, traveling from one glass to the other. So why don’t all the colors merge to become one? The molecules also like to be stable. When the level of water in each of the jars evens out, gravity comes into play, halting any further color transmission. Paper is ultimately made from the fiber of plants and the process of capillary action is what gets water from the soil to the root to the leaf of plants.
The erupting volcano is a science fair staple that causes a huge mess and involves lots of cleaning afterward. Did you know the same chemical reaction can also be used to inflate a balloon?
What You Need
Steps
Fill the bottle a quarter of the way with lime juice or vinegar. Put a tablespoon of baking soda in the balloon. Now carefully attach the balloon to the mouth of the bottle. Tip the balloon up so that the baking soda pours into the bottle causing the balloon to inflate by itself.
What’s Happening
When acid and base combine, the resulting chemical reaction creates a gas. In this case, vinegar and soda come together to create carbon dioxide. The gas rises to self-inflate the balloon. (The erupting volcano experiment requires red food color and dish soap to be added to the base to create the effect of lava flaring up.)
With this handy list of easy science experiments for kids to do at home, you can be sure that science becomes more comprehensible and super interesting for your young ones. They will immerse themselves in the joy of how things work while you can rest easy knowing they’ll be revisiting these concepts for life!